Paul Simpson in Hampshire got in touch on twitter to tell us about his pompom making and sharing in his community – he started making pompoms to help with anxiety (more in a longer blog here) and has also found the process useful right now. Here’s his story …
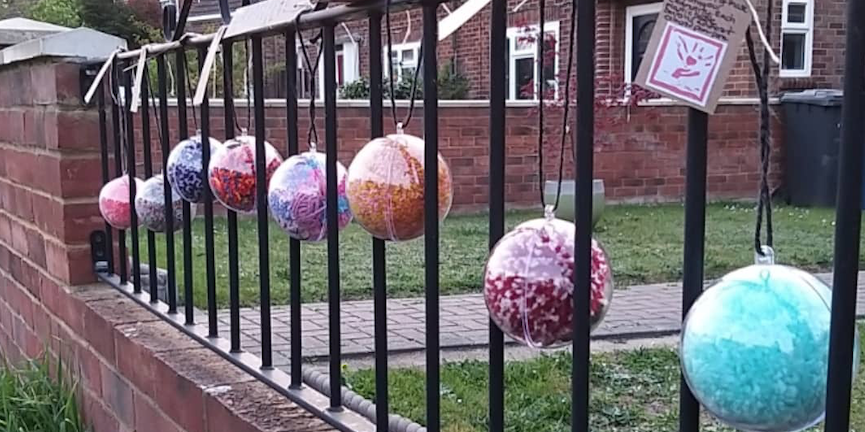
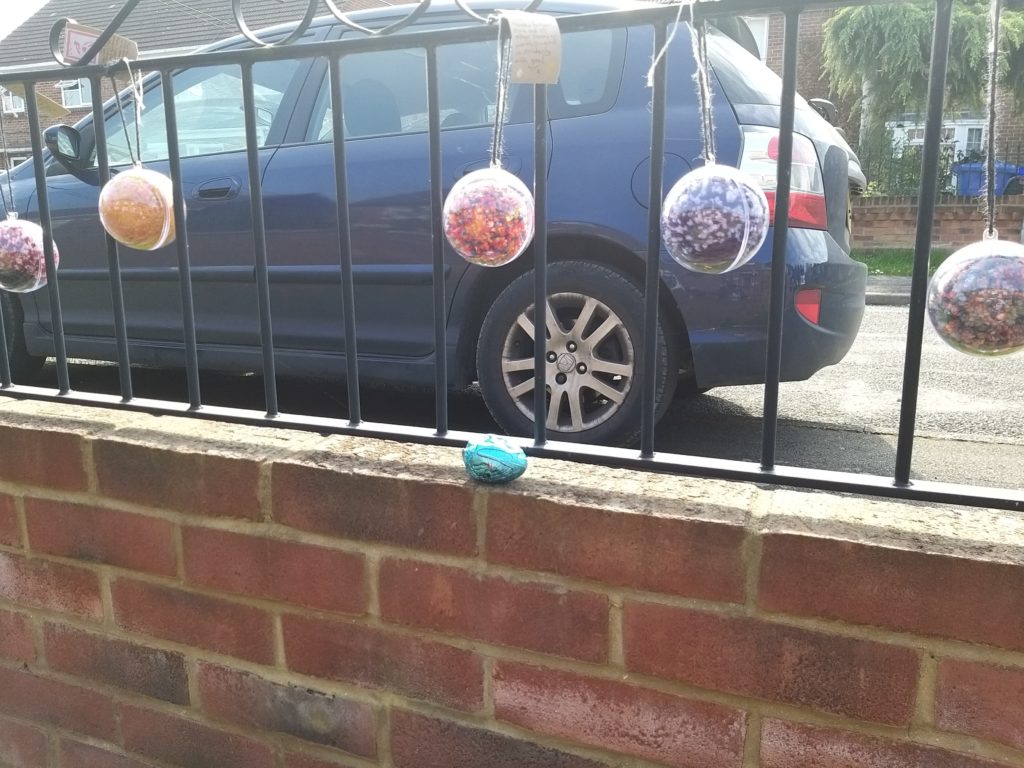
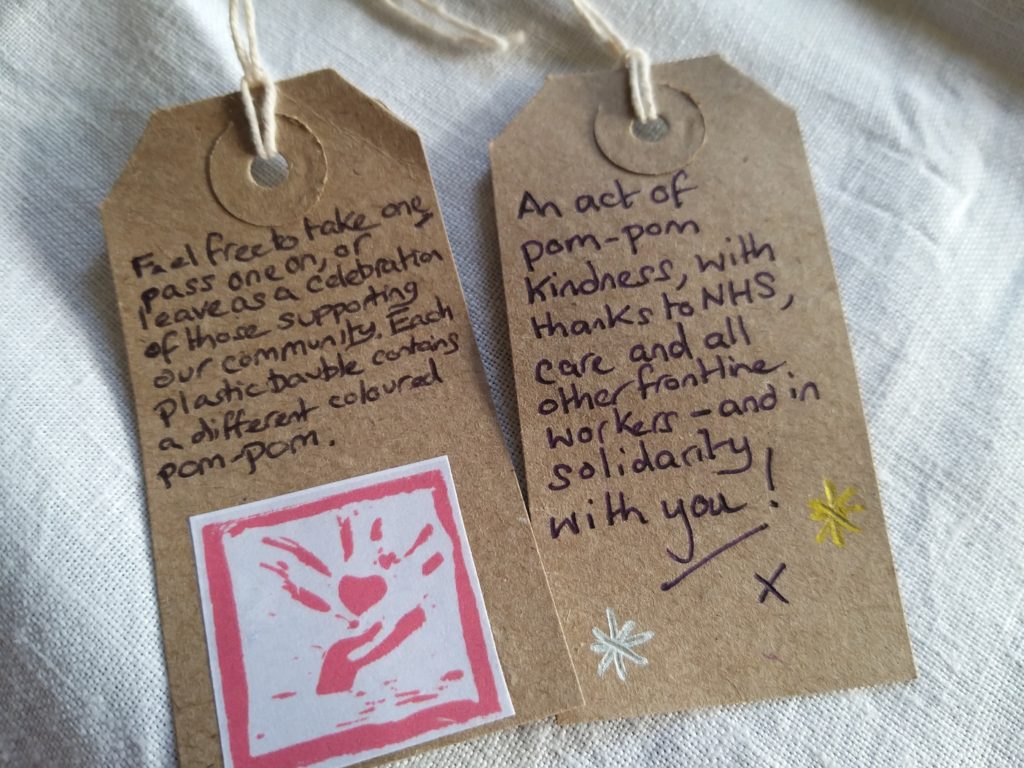
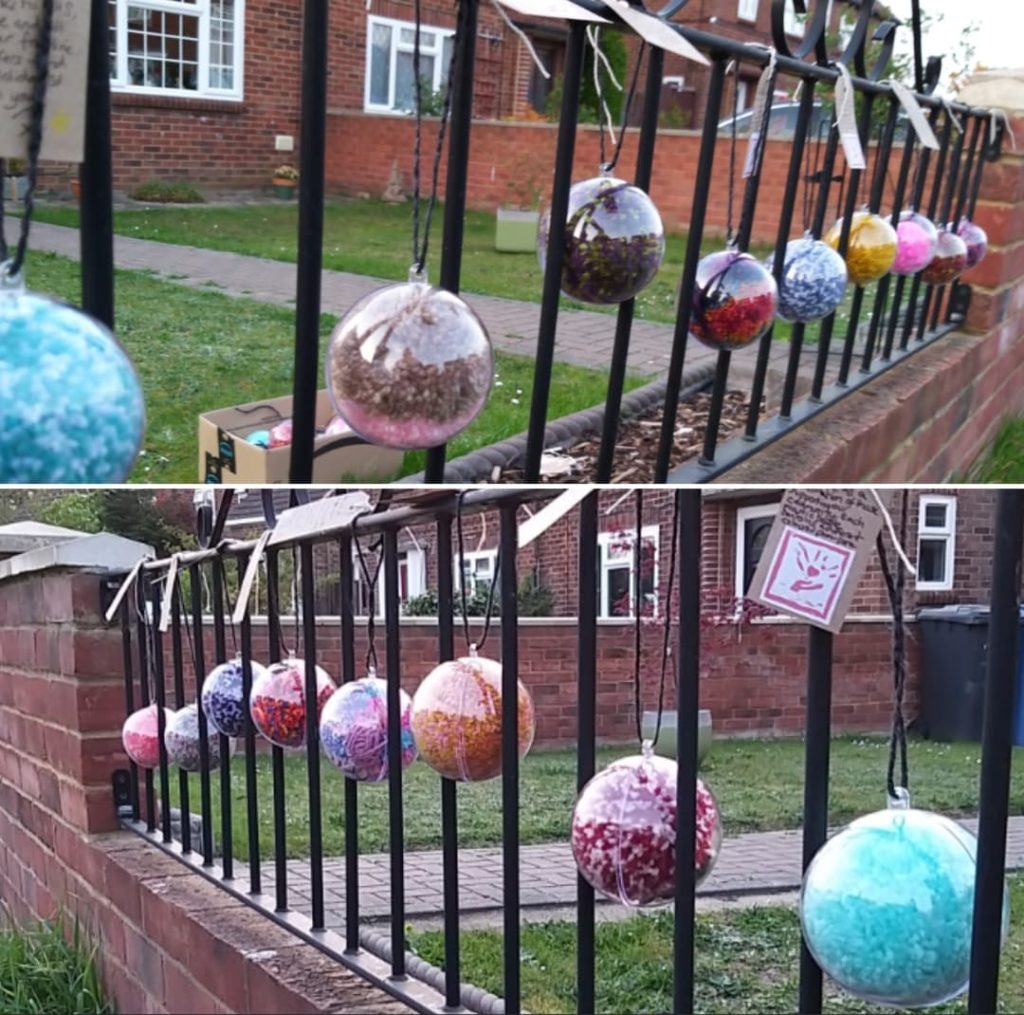
We found a way of making a connection as people walked outside our front garden, while celebrating frontline workers too. We adorned our wall with an array of coloured pom-poms, encased in a clear bauble (the kind used for gifts on the tree at Christmas), to protect them from the elements, accompanied by a message on a gift tag.
People we’ve never met have waved across the garden; left messages of thanks on our local community Facebook page – one even left a chocolate Easter egg. Anyone is welcome to take a pom-pom as an act of solidarity, to pass one on, or leave them in the display to celebrate key workers, which everyone sees, like rainbows in windows, when we #ClapForCarers weekly.
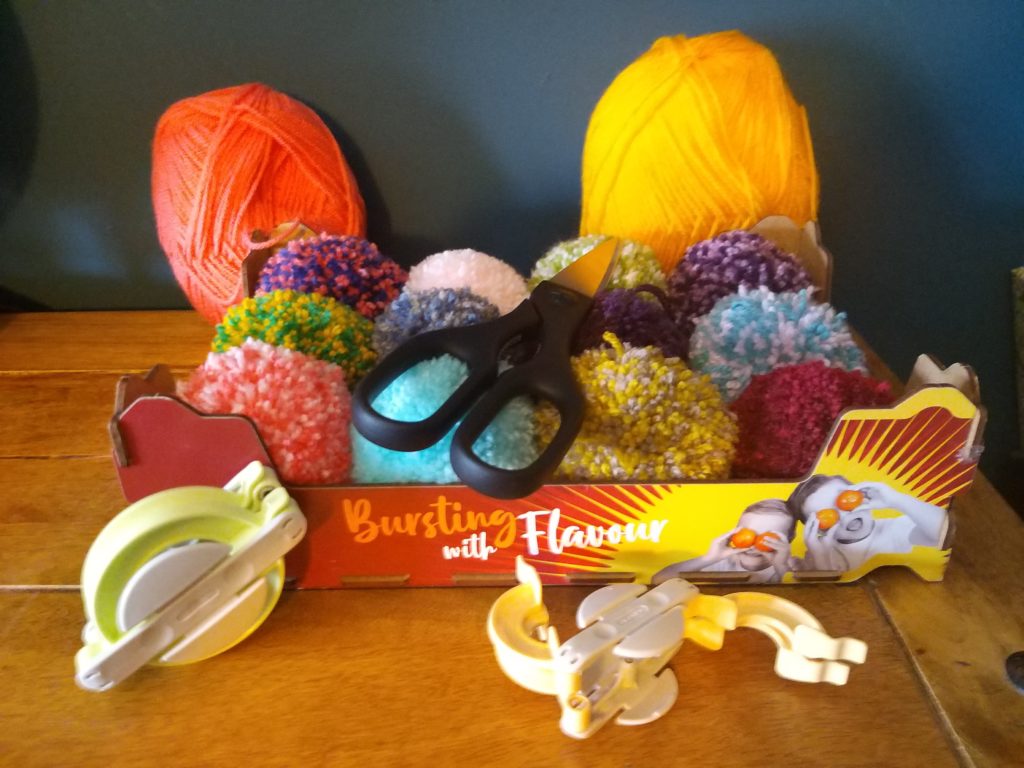
Pom-poms are pretty easy to make, with ‘how-to’ videos on YouTube. If you are using one of the easily available ‘makers’, begin by wrapping wool until full, first one way around a semi-circle, turning over, then wrapping around the other semi-circle, before closing them up, carefully cutting between the gap around the two semi-circles, double knotting a piece of wool around the gap between them, then prise apart to discover the delight of a fluffy ball. A final trim with scissors gently fluffs up the pom, giving it definition.
Alternatively, you can create your own ‘maker’ using two cardboard discs, each with a small circle cut from the middle, and a section cut from the ‘ring’, so you can get your hand in, to wrap the wool backwards and forwards around it, as a homemade effort.
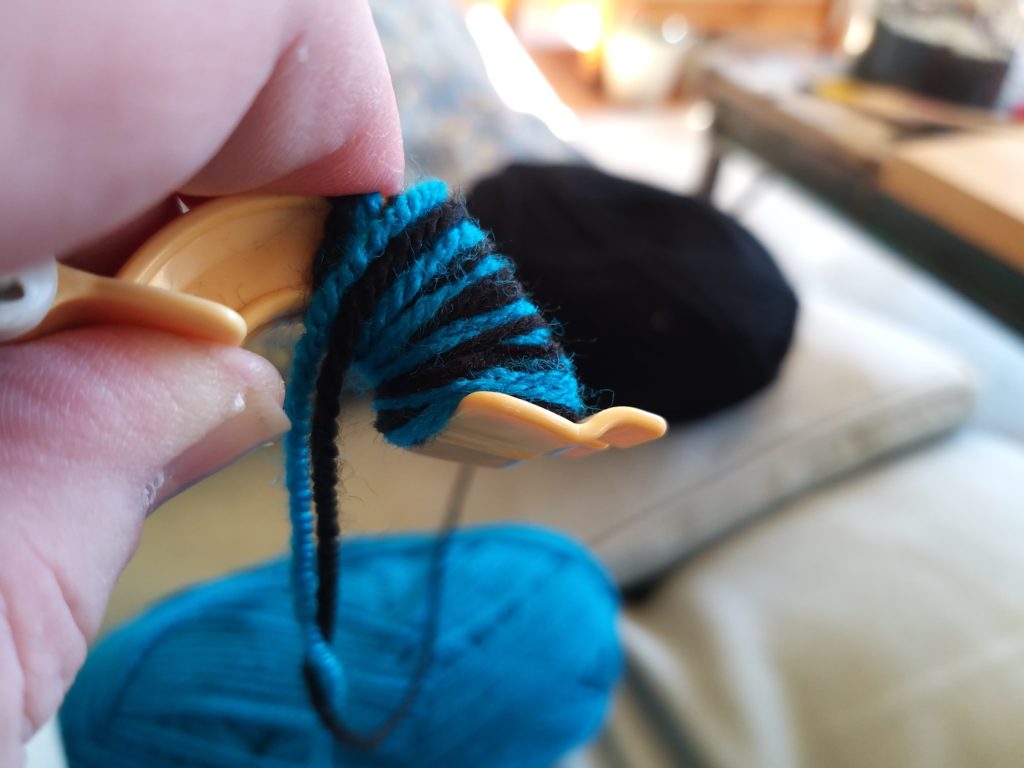
Using two strands of differently coloured wool at the same time creates a fleck effect; alternating two different colours, one at a time delivers a marble effect.
Making pom-poms has always helped me cope with anxiety, so in recent weeks, I’ve gone into overdrive. I find solace in the mindless pursuit, while listening to the radio in the evening. There is something about their texture, their playfulness – something quite therapeutic about having actually made something, which can also be used to bring delight to somebody, and help bring about some #tinyrevolutions
Here’s a basic how-to:
- Cut out two circles of cardboard – use a glass or mug as a template.
- Cut out a smaller circle in the middle of both to make a cardboard ring. The distance between the middle circle and the outside determines the size of your pompom.
- Put the two cardboard discs together. This is your pompom maker.
- Wrap wool around the circle you have created from the two cardboard circles. The thicker you wrap, the fluffier your pompom.
- When you’ve wrapped as much wool as you can, cut the wool at the edge of the circle by pushing scissors between the two discs.
- When you’ve cut all around (and take care that any short pieces don’t fall away) wrap a few longer lengths of wool between the two cardboard discs and around the pompom. Tie it off VERY tightly. Tie it again, just in case.
- Pull the pompom out from the cardboard circle, give it a shake to make it fluffier and there you have your pompom.

we are also happy to print & send to you – contact us here